One woman's quest to find yummy food besides waffles that her whole family will eat.
Thursday, May 19, 2016
Fluffy Strawberry and Champagne Pancakes
In the state of Utah, you cannot buy mini bottles of alcohol through the state liquor stores (which is basically the only place you can buy alcoholic beverages) unless you want to order an entire case. I am sure that there is some kind of reasonable logic behind this, but the end result of this state of things is that if you are like us and only cook with alcohol instead of drinking it, you end up having to buy things in rather larger bottles than you might otherwise want to, given that many recipes only call for 3-4 tablespoons... and then you're stuck finding something to do with the leftovers. We typically freeze our red and white wine and then thaw it out every time we want to use it. I have had people tell me that's a horrible thing to do to a wine, but the flavor still seems to come through well enough for the purposes of cooking. All of which is a long preamble to say- If you're looking for something to do with the leftovers of a large bottle of champagne, make these pancakes. If you're not looking for something to do with leftover champagne, go and buy a bottle and make these pancakes anyhow. They're seriously amazing. We came across this recipe from Veggie and the Beast when we were looking for something to do with all the leftover champagne we had after using just 3 tablespoons worth in the super tasty caramelized onion and jalapeno waffles, and I am so glad we decided to try them. The pancakes turn out super light and fluffy, almost like angel food cake made into pancakes, and the strawberry sauce goes really well with them.
For the Pancakes:
4 large eggs
2 cups buttermilk
1/4 cup canola oil
3 cups all purpose flour
1 tsp salt
4 tsp baking powder
1/4 cup sugar
1/2 cup champagne (we used Brut)
For the Strawberry Sauce
2 lb strawberries (we used frozen, thawed and drained)
1-1/2 cups sugar
1/2 tsp orange zest
1 Tbsp orange juice
2 tsp cornstarch
6 Tbsp champagne
Whipped cream to garnish
In a small bowl, whisk together the milk, egg, and oil. In medium sized bowl, mix together the flour, salt, baking powder, and sugar. Gradually stir the wet ingredients into the dry ingredients. The batter will be a little bit lumpy, but that's okay. Let sit for 15 minutes.
Meanwhile, preheat a griddle to 375º and start working on the strawberry sauce. In a medium saucepan, mix together the strawberries, sugar, orange zest and juice, and cornstarch. Smash the strawberries, and then bring to a boil. Reduce to a simmer and simmer uncovered for 10 minutes, stirring frequently. Remove from heat and add the 6 Tbsp champagne.
As the sauce is simmering, cook the pancakes. Gently fold the 1/2 cup champagne into the batter until it's just incorporated. Pour out 1/4 cup at a time of the batter onto the hot greased griddle. Bake on one side until bubbles begin to form, and the edges start to solidify. Flip the pancakes and cook another couple of minutes until golden. Repeat with remaining batter. Serve topped with strawberry sauce and whipped cream.
Tuesday, May 10, 2016
Pepper Lime Fettuccine with Avocado Sauce
We first made this recipe clear back in February of 2014, but it's something we've made several times since then, since it was just SO good, and I'm copying the recipe over from my Photo a Day blog for ease of finding it later when I want to make it again. :) The avocado sauce, which I found over at 5 Dollar Dinners, is super easy to throw together and would go equally well with just regular store bought pasta, but I really liked the extra layer of flavor that using homemade pepper lime fettuccine gives the dish.
For the Pepper Lime Fettuccine:
3/4 lb all purpose flour
3 large eggs, at room temperature
3 Tbsp lime juice
Grated zest of 3 limes
2 tsp black pepper
Place the flour in a large bowl and make make a well in the center to form a "volcano." In a small bowl, combine the eggs, lime juice, lime zest, and pepper. Pour the egg mixture into the center of the volcano and then beat together, slowly mixing more and more flour in from the edges until it forms a dough ball. Slowly add more water, if needed, 1 Tbsp at a time, continuing to knead by hand until all the flour is incorporated into the dough ball, and it is soft, but doesn't really stick to your fingers. Knead for 5 minutes or so by hand until the dough is cohesive and moderately smooth. Cover with a damp cloth or plastic wrap and allow the dough to rest for 30 minutes at room temperature. Then, either send through a pasta machine, or knead for another 10 minutes or so, until the dough is completely smooth and elastic, and roll out with a rolling pin and cut into noodles. Cook in lightly salted boiling water for about 4 minutes or until al dente. Meanwhile, make the sauce:
For the Avocado Sauce:
2 medium avocados
Juice and zest from 1 lemon
3 Tbsp olive oil
3 cloves garlic, crushed
2 tsp dried basil (or 6 fresh basil leaves, chopped)
Salt and Pepper to taste
Parmesan cheese to taste
1/2 cup sun dried tomatoes
While the pasta is boiling, mash up the avocados in a medium sized bowl. Stir in the rest of the sauce ingredients and serve over the top of the pasta.
Spicy Southwestern Chicken with Mango Guacamole
I love mango. It's something that we don't buy very often, since it tends to be a somewhat more expensive fruit, and honestly, it makes a sticky mess to cut it up, but I love the flavor. I also really love guacamole (so long as it's not too spicy), so when I came across this recipe from Deals to Meals that combined mango with guacamole and put it on top of chicken, I was intrigued. It turned out to be super easy to throw together (I was in a hurry to get dinner on the table at the end and used minced dried onion and thawed frozen mango chunks in the guacamole) and the kids both really liked it. The chicken is a bit spicier than I would normally do- I probably couldn't eat it plain (but again, even my kids have a higher spice tolerance than I do), but the mango guacamole helps to counteract the spiciness nicely, so that I was able enjoy the dish. The end result was super tasty- a definite keeper for our family.
For the Marinade:
5 chicken breasts
2 limes, juiced
1 t. paprika
1 t. salt
2 t. taco seasoning
2 t. cumin
2 cloves garlic, minced
Dash cayenne pepper
1 t. chili powder
1 T. brown sugar
2 T. olive oil - See more at: http://www.dealstomealsblog.com/2012/08/mango-guacamole-lime-chicken.html#sthash.l2604RaI.dpuf kk
1/4 cup lime juice2 tsp paprika
2 tsp salt
4 tsp taco seasoning
4 cloves garlic, minced
2 tsp chili powder
2 Tbsp brown sugar
1/4 cup olive oil
4 boneless skinless chicken breasts (about 2 lb)
Put the marinade ingredients and the chicken in a ziplock bag or shallow bowl and let marinate for a couple of hours. Put the chicken and marinade in a 9x9 pan and cook at 375º for 45 minutes or until the chicken breasts reach an internal temperature of 165º (since the marinade is very red, it can be a bit hard to tell if the breasts are done without a meat thermometer). Meanwhile, cook up some rice and make the mango guacamole.
For the Mango Guacamole
1/2 cup chopped sun dried tomato
3 large avocados
2 garlic cloves, minced
1/2 cup chopped onion (or 1-1/2 Tbsp minced dried or 3/4 tsp powder)
2 cups diced mango (we used frozen mango that we thawed)
1-1/2 Tbsp lime juice
1/2 tsp salt
Serve the chicken over hot cooked rice and top with the mango guacamole.
1 t. salt
2 t. taco seasoning
2 t. cumin
2 cloves garlic, minced
Dash cayenne pepper
1 t. chili powder
1 T. brown sugar
2 T. olive oil - See more at: http://www.dealstomealsblog.com/2012/08/mango-guacamole-lime-chicken.html#sthash.kJN6xNMj.dpuf
1 t. salt
2 t. taco seasoning
2 t. cumin
2 cloves garlic, minced
Dash cayenne pepper
1 t. chili powder
1 T. brown sugar
2 T. olive oil - See more at: http://www.dealstomealsblog.com/2012/08/mango-guacamole-lime-chicken.html#sthash.l2604RaI.dpuf
5 chicken breasts
2 limes, juiced
1 t. paprika
1 t. salt
2 t. taco seasoning
2 t. cumin
2 cloves garlic, minced
Dash cayenne pepper
1 t. chili powder
1 T. brown sugar
2 T. olive oil - See more at: http://www.dealstomealsblog.com/2012/08/mango-guacamole-lime-chicken.html#sthash.l2604RaI.dpuf
5 chicken breasts
2 limes, juiced
1 t. paprika
1 t. salt
2 t. taco seasoning
2 t. cumin
2 cloves garlic, minced
Dash cayenne pepper
1 t. chili powder
1 T. brown sugar
2 T. olive oil - See more at: http://www.dealstomealsblog.com/2012/08/mango-guacamole-lime-chicken.html#sthash.l2604RaI.dpuf
jkljkl5 chicken breasts
2 limes, juiced
1 t. paprika
1 t. salt
2 t. taco seasoning
2 t. cumin
2 cloves garlic, minced
Dash cayenne pepper
1 t. chili powder
1 T. brown sugar
2 T. olive oil - See more at: http://www.dealstomealsblog.com/2012/08/mango-guacamole-lime-chicken.html#sthash.l2604RaI.dpuf
Monday, March 21, 2016
Black Rice Apple and Pear Risotto with Parsley Basil Pesto
A few days ago, when I was trying to come up with a menu for this week, my older sister told me that she had made a risotto out of black rice. Justin and I have had some good success with making risottos, and since black rice was supposed to have some different health benefits and an interesting flavor and texture, I was intrigued by the idea. This particular recipe was cobbled together using this black rice risotto from Ellie Krieger and this apple walnut risotto, plus some other ideas we brainstormed during that conversation. Inspired by the basil garnish on Ellie Krieger's risotto, I decided to top ours with a pesto slightly modified from one found in this cookbook. The risotto turned out fantastic, and the pesto went really well, though it's not strictly necessary if you are not a fan of pesto. :)
Ingredients
For the Risotto:
6 cups chicken broth
2 tablespoons extra-virgin olive oil
1 medium onion, finely chopped (about 1 cup)
2 cloves garlic, minced
1 1/2 cups black rice
1/2 cup dry white wine (Martinelli's sparkling apple pear would work well as a nonalcoholic substitute for this recipe)
black pepper to taste
1/2 tsp salt
1 granny smith apple, chopped
1 green pear, chopped
4 oz smoked Gouda, cubed
1/4 cup crumbled Gorgonzola
For the Pesto:
1 bulb garlic, roasted
3/4 cup chopped flat-leaf parsley
1/2 cup fresh basil leaves
3 Tbsp toasted pecans
1/4 cup olive oil
Salt and pepper to taste
In a food processor, combine pecans, parsley, basil and garlic and process until fairly well chopped. Pour in oil and sprinkle with salt and pepper to taste. Continue to process until desired pesto texture. Set aside.
Heat the broth in a medium pot over medium-high heat until hot but not boiling. Reduce the heat to medium low; keep warm while you make the risotto.
Heat the oil in large frying pan over medium heat. Add the onion and garlic and stir to coat. Cook until very soft, about 4 minutes, then stir in the rice until evenly coated. Cook for 1 minute, then add the wine; reduce the heat to medium-low and cook until the wine is almost completely absorbed, about 3 minutes. Add about 3/4 cup of the hot broth, stirring frequently until the broth is almost completely absorbed, 6 to 7 minutes. Repeat with the remaining broth, adding about 3/4 cup at a time, until the rice is tender yet still a little bit chewy and the dish is creamy-looking, about 50 minutes total. Add the chopped apple at the same time as the last of your chicken broth. Remove from the heat and stir in the 1/2 teaspoon of salt, pepper to taste, the pear, and the gouda and gorgonzola. Serve topped with the pesto.
Ingredients
For the Risotto:
6 cups chicken broth
2 tablespoons extra-virgin olive oil
1 medium onion, finely chopped (about 1 cup)
2 cloves garlic, minced
1 1/2 cups black rice
1/2 cup dry white wine (Martinelli's sparkling apple pear would work well as a nonalcoholic substitute for this recipe)
black pepper to taste
1/2 tsp salt
1 granny smith apple, chopped
1 green pear, chopped
4 oz smoked Gouda, cubed
1/4 cup crumbled Gorgonzola
For the Pesto:
1 bulb garlic, roasted
3/4 cup chopped flat-leaf parsley
1/2 cup fresh basil leaves
3 Tbsp toasted pecans
1/4 cup olive oil
Salt and pepper to taste
In a food processor, combine pecans, parsley, basil and garlic and process until fairly well chopped. Pour in oil and sprinkle with salt and pepper to taste. Continue to process until desired pesto texture. Set aside.
Heat the broth in a medium pot over medium-high heat until hot but not boiling. Reduce the heat to medium low; keep warm while you make the risotto.
Heat the oil in large frying pan over medium heat. Add the onion and garlic and stir to coat. Cook until very soft, about 4 minutes, then stir in the rice until evenly coated. Cook for 1 minute, then add the wine; reduce the heat to medium-low and cook until the wine is almost completely absorbed, about 3 minutes. Add about 3/4 cup of the hot broth, stirring frequently until the broth is almost completely absorbed, 6 to 7 minutes. Repeat with the remaining broth, adding about 3/4 cup at a time, until the rice is tender yet still a little bit chewy and the dish is creamy-looking, about 50 minutes total. Add the chopped apple at the same time as the last of your chicken broth. Remove from the heat and stir in the 1/2 teaspoon of salt, pepper to taste, the pear, and the gouda and gorgonzola. Serve topped with the pesto.
Sunday, November 22, 2015
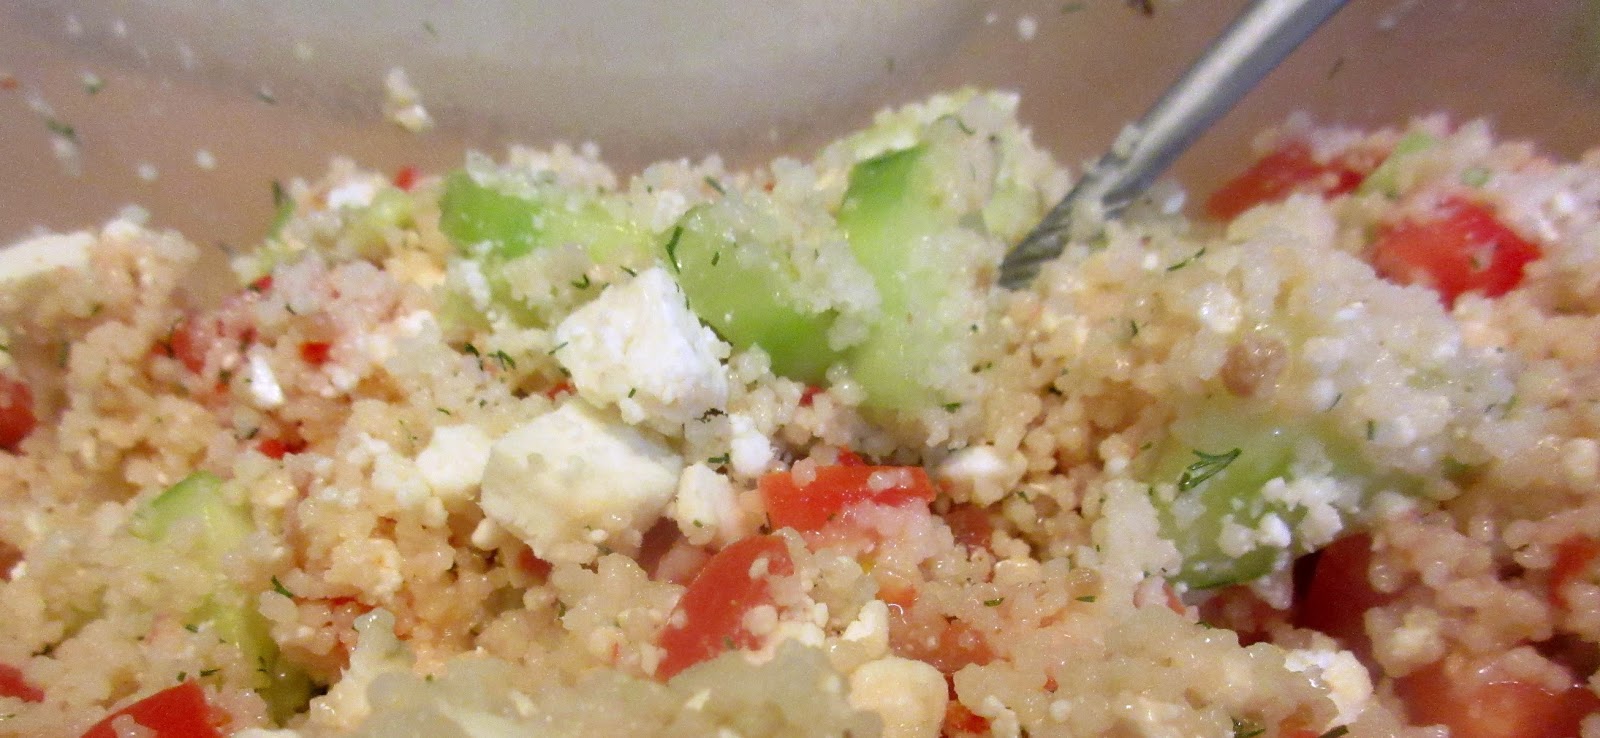
Greek Style Couscous
This salad (originally found from a Kraft food magazine) is one of our kids' favorites. It makes a good side dish, but is actually hearty enough that, if served with a side of garlic toast, you can actually have it as a main dish, which is great for those summer days when it's just too hot to use the oven.
2 cups uncooked whole wheat couscous (we generally just use plain)
2 cups cucumber slices halved or quartered
2 large tomatoes, chopped
8 oz crumbled feta cheese
2 tsp dried dill or 2 Tbsp fresh
1 cup Italian dressing
Cook couscous as directed on package, without the salt and butter. Fluff with fork. Place in large bowl; cool 10 min. Add remaining ingredients and mix. Original recipe says to chill 1 hour, but we generally don't bother and just eat it right away.
Saturday, October 17, 2015
Tomatillo Ranch Chicken
I'll admit that I was a tad wary of this recipe when I first saw it going around Pinterest. I am very much not a fan of most Mexican food (and the original blogger over at Creme de la Crumb went on for quite a while in her introduction of the recipe about how much she loves Mexican food). Still, the only ingredient involved that I'd never actually tried was tomatillos, and everything else looked pretty good, so since I'm always up for a new way to serve boneless chicken breasts, I was willing to give it a try. I'm so glad I did- it was way easy to toss together and almost everyone loved the dish (though my 5-year-old wouldn't touch it- no surprise there. He doesn't believe in sauces). This one is definitely going to stick around in our regular recipe rotation.
Ingredients:
2 lb boneless skinless chicken breasts
1 cup mayonaise
1/2 cup buttermilk
1 package buttermilk ranch dressing mix (we used 2 Tbsp of homemade ranch dressing mix, which basically follows this recipe)
2 cloves garlic, coarsley chopped
1 cup cilantro, chopped
3 tomatillos, husked and chopped
1/2 tsp lime juice
Hot cooked rice
Toss the mayo, buttermilk, dressing mix, garlic, cilantro, tomatillos, and lime juice into a blender and blend until smooth. Pour 1 cup of the dressing into a large bowl or gallon bag. Place the rest of the dressing in a separate container and chill to top the chicken after it's cooked. Add the chicken breasts to the 1 cup of dressing and make sure they're coated. Marinate in the fridge for at least half an hour to overnight.
When ready to make the chicken, preheat oven to 375º. Drain chicken breasts and place them in a shallow greased baking dish. Bake 25-30 minutes, or until chicken is cooked through. Serve over rice with the additional dressing spooned over the top. We served this with cornbread and broiled corn and it made enough for 2 adults and 1 preschooler for 2 days worth of dinner.
Sunday, August 23, 2015
Almond Coconut Cake with Dairy-Free Almond Frosting
Last week, Justin and I were planning on having a celebration for both our kids' birthdays down in the Salt Lake area closer to where our families are, and we stayed up late into the night making the cool airplane cake that Taliesin had requested.
Unfortunately, Lionel woke up late that night with a stomach bug, which meant that not only did we have to reschedule the party for the next weekend, but also we had an entire spice cake with cream cheese frosting to finish off- and less than a month after having made Lionel's birthday cake. Taliesin was adamant, though, that it couldn't be a proper birthday celebration without some kind of cake, so Justin and I decided that we would find an easy gluten free, dairy free cake so that we could be sure everyone would be able to have a slice, leaving us with less cake to have to take home (and our strategy worked- we only had two pieces left over). This almond cake recipe from Bob's Red Mill fit the bill- it's not nearly as cute as the airplane, but it was much, much tastier than a box spice cake mix, and not actually much more work in my Kitchen Aid. Making the almond flour and coconut flour definitely took some time, but it didn't require that much active attention, so it was surprisingly easy to do, and if you don't feel like making the flour yourself and don't mind spending an arm and a leg for it, you could obviously just buy the flour from the store instead of making it yourself.
Ingredients:
3/4 cup butter, softened
1 cup sugar
4 eggs
1/2 cup milk
1 tsp vanilla flavoring
1/4 tsp almond extract
1-1/2 cups almond flour
1/2 cup coconut flour
2 tsp baking powder
1/4 tsp salt
Frosting (recipe below)
Preheat oven to 350º. Grease a 9x13 pan with vegetable shortening and set aside. Don't leave your butter softening in a bowl on top of the back burner while you're preheating the oven, though, or you'll find yourself having to re-solidify it in the fridge before you can make the recipe. Not that I know this from experience or anything...
In a small bowl, mix together the almond flour, coconut flour, baking powder, and salt, and set aside.
In a large bowl, cream together the butter and sugar until light and fluffy, around 7-10 minutes.
Add the eggs, one at a time, beating until fully blended after each one. Add the milk, almond extract, and vanilla flavoring, and mix until combined.
Add the flour mixture to the butter mixture, and beat until creamy- but this batter is going to be much stiffer and much less smooth than a normal cake batter.
Bake at 350º about 25 minutes or until a toothpick comes out of the center clean, and let cool completely before frosting. Mine came out of the oven with a random hole in the middle for no apparent reason.
Frost with your favorite frosting, or use the recipe below for a dairy-free almond flavored frosting that went smashingly. I decided to adapt a butter frosting recipe I that had to use coconut oil and coconut milk so it would be a dairy free frosting that didn't use shortening (I don't like the flavor of shortening) but if you aren't trying to make your frosting dairy free, you can feel free to use margarine or butter and regular milk.
Ingredients:
1/3 cup coconut oil
4-1/2 cups powdered sugar
1/4 cup coconut milk, plus additional coconut milk to desired consistency
1 tsp almond flavoring
Place the 1/3 cup coconut oil in a mixing bowl and refrigerate it for 5 minutes or until relatively solid. Trust me- you want to do this step. Originally, I only made a half batch and just used the coconut oil straight out of the cupboard. My frosting was oddly grainy and very thin- even with a bunch of extra powdered sugar added in.
Once the coconut oil is mostly solid, beat on medium speed until fluffy. Gradually add 2 cups of the powdered sugar, beating well. Slowly beat in the 1/4 cup coconut milk and almond flavoring. Slowly beat in remaining powdered sugar. Beat in additional coconut milk, if needed, to reach a spreading consistency.
If desired, tint with food coloring, and spread over the cake.
Homemade Almond Milk and Almond Flour
I made this homemade almond milk and almond flour using these instructions from All Sorts of Pretty's blog. My point was actually to
get almond flour in order to make a gluten free birthday
cake for my kids that my in-laws could both eat, but the almond milk is a handy byproduct if you want to drink it. I like drinking it with chocolate milk powder added. :) The recipe is super simple to make- and the only equipment required is a blender, a strainer and a flour sack towel or cheese cloth. Two cups worth of almonds made me close to 2 mason jars worth of almond milk plus about 1-1/2 cups of almond flour. The instructions I followed actually used about double the water I did, and you would obviously get more almond milk that way, but the thickness of the milk I ended up with seemed closer to what I remembered getting the couple of times I've bought almond milk from the store.
Ingredients:
2 cups raw almonds
4-6 cups water to soak plus another 4 cups water later.
1 tsp salt
Instructions:
Place the 2 cups of almonds into a large bowl, and cover with the 4-6 cups of water. Add the salt, and let sit for at least 12 hours. When you're ready to make the milk, drain the almonds and rinse them off. Line a strainer with a flour sack towel or cheesecloth, and place over a large bowl (I like using the flour sack towel because the tighter weave means you don't have to try to pick bits of almond pulp out afterward). Place the almonds into a blender with the water, and blend on high for 3-4 minutes or until you can see that it's creamy looking and the almond is blended into very tiny bits, then dump into the towel-lined strainer, so that the almond milk drains into the bowl. My blender isn't big enough to hold the whole thing, so I had to do mine in two batches- I put in 1 cup almonds plus 2 cups water, blended it up and dumped it in the strainer, and then blended up the second batch. Then, squeeze the pulp that's inside the towel over the bowl to get out as much as much of the almond milk as you can (don't throw the pulp away when it's squeezed dry!). Put the contents of the bowl into whatever storage containers you're going to use for the milk and you now have coconut milk!
For the almond flour, dump the blended up pulp onto an ungreased cookie sheet. Preheat your oven to about 175º. Spread the pulp out into a thin layer on the cookie sheet, using a fork to break up any large lumps, and cook in the oven until completely dry. If you touch the pulp and feel any moisture at all, it's not quite ready. It took my almond pulp about 3-1/2 hours to dry completely.
At this point, the almond pulp will still be very lumpy and not quite flour like:
Once it's cooled, toss in the blender, and blend on high speed for several minutes to make the texture more flour-like. Unless you have a more impressive blender than mine, this is not going to be the flour powder that you'll find at a store, but even with a bit of graininess, it worked perfectly fine for the recipe I used it in.
Two cups worth of almonds gave me somewhere close to 1-1/2 cups of almond flour (you can see that the half cup measuring cup in the picture above is not quite full, but it was pretty close).
Ingredients:
2 cups raw almonds
4-6 cups water to soak plus another 4 cups water later.
1 tsp salt
Instructions:
Place the 2 cups of almonds into a large bowl, and cover with the 4-6 cups of water. Add the salt, and let sit for at least 12 hours. When you're ready to make the milk, drain the almonds and rinse them off. Line a strainer with a flour sack towel or cheesecloth, and place over a large bowl (I like using the flour sack towel because the tighter weave means you don't have to try to pick bits of almond pulp out afterward). Place the almonds into a blender with the water, and blend on high for 3-4 minutes or until you can see that it's creamy looking and the almond is blended into very tiny bits, then dump into the towel-lined strainer, so that the almond milk drains into the bowl. My blender isn't big enough to hold the whole thing, so I had to do mine in two batches- I put in 1 cup almonds plus 2 cups water, blended it up and dumped it in the strainer, and then blended up the second batch. Then, squeeze the pulp that's inside the towel over the bowl to get out as much as much of the almond milk as you can (don't throw the pulp away when it's squeezed dry!). Put the contents of the bowl into whatever storage containers you're going to use for the milk and you now have coconut milk!
For the almond flour, dump the blended up pulp onto an ungreased cookie sheet. Preheat your oven to about 175º. Spread the pulp out into a thin layer on the cookie sheet, using a fork to break up any large lumps, and cook in the oven until completely dry. If you touch the pulp and feel any moisture at all, it's not quite ready. It took my almond pulp about 3-1/2 hours to dry completely.
At this point, the almond pulp will still be very lumpy and not quite flour like:
Once it's cooled, toss in the blender, and blend on high speed for several minutes to make the texture more flour-like. Unless you have a more impressive blender than mine, this is not going to be the flour powder that you'll find at a store, but even with a bit of graininess, it worked perfectly fine for the recipe I used it in.
Two cups worth of almonds gave me somewhere close to 1-1/2 cups of almond flour (you can see that the half cup measuring cup in the picture above is not quite full, but it was pretty close).
Homemade Coconut Milk and Coconut Flour
I made this homemade coconut milk and coconut flour using these
instructions from All Sorts of Pretty's blog. My point was actually to
get coconut flour in order to make a gluten free almond birthday
cake for my kids that my in-laws could both eat. This coconut milk seems to be
rather thinner than the stuff you get in a can from the store, so I'm
not sure I'd use it to cook with it, but the coconut milk is a handy byproduct if you want to drink it. The recipe is super simple, and all it takes is two ingredients:
2 cups coconut dried flakes (The recipe calls for unsweetened, but I used sweetened, because that's what we had in the pantry)
2 cups water
Place the coconut flakes and the water into your blender and let it soak for at least 2 hours (I let it sit there while running errands, so mine was closer to 4 hours).
Blend on high speed for 3-5 minutes, or until it's a creamy and smooth consistency. Place a strainer into a bowl and line with a flour sack towel or cheesecloth, and dump the contents of the blender into the towel-lined strainer, to let the coconut milk drain into the bowl. I like using the flour sack towel because the tighter weave means you don't have to try to pick bits of coconut pulp out afterward. Then, squeeze the pulp inside the towel over the bowl to get out as much as much coconut milk as you can (don't throw the pulp away when it's squeezed dry!). Put the contents of the bowl into whatever storage container you're going to use for the milk and voila! You have coconut milk! I ended up with a little bit more than half a mason jar full of milk.
For the coconut flour, dump the blended up pulp onto an ungreased cookie sheet.
Preheat your oven to it's lowest temperature- for me that's about 150º. Spread the pulp out into a thin layer on the cookie sheet, using a fork to break up any large lumps, and cook in the oven until completely dry. If you touch the pulp and feel any moisture at all, it's not quite ready. It took my pulp about an hour and a half to dry completely.
At this point, the pulp will be dry, but still very lumpy.
In order to get it to a flour-like consistency, you'll have to blend it up, which I did using my blender for a few minutes. The two cups worth of coconut flakes that I used yielded about 2/3 cup of flour.
This is not going to be the fine flour powder that you'll find at a store, but even with a bit of graininess, it worked perfectly fine for the recipe I used it in.
As I was looking around online, it looks like people who are regularly making their own coconut and almond flour frequently will buy a coffee grinder to get a better powdery consistency, so if this is something you'll be doing regularly, you should probably consider that.
2 cups coconut dried flakes (The recipe calls for unsweetened, but I used sweetened, because that's what we had in the pantry)
2 cups water
Place the coconut flakes and the water into your blender and let it soak for at least 2 hours (I let it sit there while running errands, so mine was closer to 4 hours).
Blend on high speed for 3-5 minutes, or until it's a creamy and smooth consistency. Place a strainer into a bowl and line with a flour sack towel or cheesecloth, and dump the contents of the blender into the towel-lined strainer, to let the coconut milk drain into the bowl. I like using the flour sack towel because the tighter weave means you don't have to try to pick bits of coconut pulp out afterward. Then, squeeze the pulp inside the towel over the bowl to get out as much as much coconut milk as you can (don't throw the pulp away when it's squeezed dry!). Put the contents of the bowl into whatever storage container you're going to use for the milk and voila! You have coconut milk! I ended up with a little bit more than half a mason jar full of milk.
For the coconut flour, dump the blended up pulp onto an ungreased cookie sheet.
Preheat your oven to it's lowest temperature- for me that's about 150º. Spread the pulp out into a thin layer on the cookie sheet, using a fork to break up any large lumps, and cook in the oven until completely dry. If you touch the pulp and feel any moisture at all, it's not quite ready. It took my pulp about an hour and a half to dry completely.
At this point, the pulp will be dry, but still very lumpy.
In order to get it to a flour-like consistency, you'll have to blend it up, which I did using my blender for a few minutes. The two cups worth of coconut flakes that I used yielded about 2/3 cup of flour.
This is not going to be the fine flour powder that you'll find at a store, but even with a bit of graininess, it worked perfectly fine for the recipe I used it in.
As I was looking around online, it looks like people who are regularly making their own coconut and almond flour frequently will buy a coffee grinder to get a better powdery consistency, so if this is something you'll be doing regularly, you should probably consider that.
Saturday, April 11, 2015
Ginger Lime Soda
A couple months back, I suddenly noticed that the awesome Indian cookbook that I'd gotten for Justin as a Valentine's Day present clear back in 2008 had a drinks section in it that we'd never even touched. As I curiously perused it, one of the things that stood out to me as something I'd love to try was this recipe for ginger lime soda, and once I'd managed to confirm that we actually could buy lime soda at the store (it was over with the Mexican and other "ethnic" foods), I decided to put it on the menu, and it turned out to be really tasty. It's not something we'll make all the time, since we just don't drink much soda, but definitely a recipe to keep around.
The recipe calls for ginger juice, made by peeling and grating a piece ginger, and then squishing the grated ginger in a garlic press to make the juice come out. It was actually easier to make than I thought it would be, though I do have the advantage of my awesome salad shooter that makes quickly grating the ginger a snap. For the 2 Tbsp of ginger called for in the recipe, I used a piece of ginger that was a bit bigger than my palm:
I thought that would be a bit too big, but it was actually just barely enough.
The recipe also calls for black salt (which, for some reason, is actually pastel pink):
We got ours at an Indian grocer during a trip to visit Justin's folks when they still lived in Maryland, but if you don't have an Indian grocer near you, you can get it (like everything else in the universe) on Amazon. Black salt is salty, but also has a kind of sulfurish smell and taste reminiscent of egg yolks... judging by Amazon reviews, evidently it's a popular ingredient with vegans, who use it to give recipes an egg flavor without actually using eggs. The taste isn't at all noticeable in the drink, so if you really don't want to buy the black salt, you could probably just leave it out or add a small amount of regular salt, but it would be missing that extra layer of flavor.
Ingredients:
2 Tbsp ginger juice
4 tspsugar
1/4 tsp black salt
1 Tbsp lime juice
1.5 liters lime soda
ice cubes (we used about half a tray)
Add all ingredients to a blender; blend well. If, like us, your blender is not quite big enough to hold 1.5 liters of soda plus the ice, you can just put most of the soda in with the ice and the other ingredients and put the rest of the soda in whatever container you have that is actually big enough to hold 1.5 liters, and the pour the contents of the blender in with the rest of the soda after it's all blended. :)
The recipe calls for ginger juice, made by peeling and grating a piece ginger, and then squishing the grated ginger in a garlic press to make the juice come out. It was actually easier to make than I thought it would be, though I do have the advantage of my awesome salad shooter that makes quickly grating the ginger a snap. For the 2 Tbsp of ginger called for in the recipe, I used a piece of ginger that was a bit bigger than my palm:
I thought that would be a bit too big, but it was actually just barely enough.
The recipe also calls for black salt (which, for some reason, is actually pastel pink):
We got ours at an Indian grocer during a trip to visit Justin's folks when they still lived in Maryland, but if you don't have an Indian grocer near you, you can get it (like everything else in the universe) on Amazon. Black salt is salty, but also has a kind of sulfurish smell and taste reminiscent of egg yolks... judging by Amazon reviews, evidently it's a popular ingredient with vegans, who use it to give recipes an egg flavor without actually using eggs. The taste isn't at all noticeable in the drink, so if you really don't want to buy the black salt, you could probably just leave it out or add a small amount of regular salt, but it would be missing that extra layer of flavor.
Ingredients:
2 Tbsp ginger juice
4 tspsugar
1/4 tsp black salt
1 Tbsp lime juice
1.5 liters lime soda
ice cubes (we used about half a tray)
Add all ingredients to a blender; blend well. If, like us, your blender is not quite big enough to hold 1.5 liters of soda plus the ice, you can just put most of the soda in with the ice and the other ingredients and put the rest of the soda in whatever container you have that is actually big enough to hold 1.5 liters, and the pour the contents of the blender in with the rest of the soda after it's all blended. :)
Honey Balsamic Roasted Beets
Growing up, I never really ate any beets- it's just not something that my mom ever made. However, whenever we make the beet pasta recipe, we always end up with leftover beets that we don't really have anything to do with (since you can only buy beets at Walmart in bunches of 3, but the recipe only needs 1/4 cup worth). So, since I discovered that they were actually pretty tasty on their own, I started to keep my eye out for interesting beet recipes on Pinterest. This honey balsamic roasted beets recipe was inspired by this one on Simply Recipes. I loved the idea of balsamic vinegar with beets, but I didn't have any orange zest on hand, and also I only had 2 beets on hand instead of 2 pounds worth.
Ingredients:
Beets
Olive oil
Honey
Salt
Pepper
Garlic powder
Balsamic vinegar
Preheat oven to 400º. While oven heats up, slice the tops off the beets, peel them, and cut into large chunks. Place into a greased baking pan, and drizzle with a small amount of olive oil (about 1 Tbsp for 2 beets), and a rather larger amount of honey. Sprinkle liberally with salt, pepper, garlic powder, and balsamic vinegar. Stir around with a fork to make sure the beets are all coated with honey and spices. Cover the pan with foil and roast for 1 hour, or until easily pierced with a fork, stirring about halfway through, and again at about 45 minutes.
Ingredients:
Beets
Olive oil
Honey
Salt
Pepper
Garlic powder
Balsamic vinegar
Preheat oven to 400º. While oven heats up, slice the tops off the beets, peel them, and cut into large chunks. Place into a greased baking pan, and drizzle with a small amount of olive oil (about 1 Tbsp for 2 beets), and a rather larger amount of honey. Sprinkle liberally with salt, pepper, garlic powder, and balsamic vinegar. Stir around with a fork to make sure the beets are all coated with honey and spices. Cover the pan with foil and roast for 1 hour, or until easily pierced with a fork, stirring about halfway through, and again at about 45 minutes.
Tuesday, March 10, 2015
Caramelized Onion and Jalapeño Waffles with Radish Salad
This recipe comes from a kind of odd cookbook Justin picked up that we haven't really cooked much out of yet. It's a lot of ingredients, and involves a lot more prep work than I'd normally choose for a recipe, but I was intrigued by the concept of onions and herbs in waffles. It is amazingly tasty and very filling- though the kids wouldn't touch the strange looking green-speckled waffles I did most of the prep work of chopping onions, zesting and juicing the lemon, mincing herbs, etc. beforehand, which actually made it a lot easier to throw it all together later that day. My toddler has a higher spice tolerance than I do, so we only used 1/2 the jalapeño the first time we made it, since I was afraid of the heat, but these waffles weren't really spicy at all, so when we made them another time around, we put in the the whole one and it worked just fine. We also originally served the salad next to the waffles rather than on top of them, since I was uncertain about putting a salad on top of a waffle.
It turns out that they go together very well, and the salad actually isn't weird on top as you might think. I actually prefer it that way now, but if you're uncertain, you can certainly feel free to put it on the side. The flavor of the lemon cream went perfectly with both the salad and the waffles. This was a very rich recipe- Justin and I could only eat one waffle plus a serving of salad each.
Ingredients:
For Waffles:
3 Tbsp unsalted butter
2 yellow onions, finely diced
1 jalapeño chille, seeded and minced
3 Tbsp champagne or sparkling wine or preferred non-alcoholic substitute
2 cups all-purpose flour
1/2 cup mixed minced fresh herbs (we used parsley, thyme, and cilantro)
1-1/2 Tbsp baking powder
1/2 tsp black pepper
1 tsp salt
1-1/2 cups milk
2 eggs
1/3 cup melted ghee (clarified butter)
For Lemon Cream Sauce:
1 cup sour cream
1/4 cup milk
grated zest of 1 lemon
5 Tbsp lemon juice
1/2 tsp salt
1 tsp sugar
For Radish Salad
8 oz mixed salad greens
2 bunches radishes, trimmed and thinly sliced
3 green onions, including light green parts, finely chopped
5 Tbsp lemon juice
2 Tbsp olive oil
1-1/2 tsp dijon mustard
salt and pepper to taste
Garnish (optional): 4 oz smoked salmon, chopped (we didn't use this the first time around, given that smoked salmon is pretty expensive. The waffles and salad were definitely very tasty even without it... but we decided to splurge and buy the smoked salmon the next time around... it was amazing).
Instructions:
To caramelize onions, melt butter in a large skillet over medium heat. Add onions and jalapeño and cook until onions are caramelized, about 8-10 minutes. Add wine substitute and simmer until thoroughly reduced and set aside.
Meanwhile, for lemon cream sauce, mix all ingredients together in a medium mixing bowl, cover and refrigerate.
For salad, toss together greens, radishes and onions in a largish mixing bowl. In a small nonmetal bowl, mix together lemon juice, olive oil, mustard and salt and pepper. Whisk to blend. Cover and refrigerate until just before serving salad.
To make waffles, combine flour, herbs, baking powder, pepper and salt. Stir to blend. In a separate bowl, combine milk, eggs, and melted ghee and whisk thoroughly. Fold wet ingredients into dry ingredients and mix until just moistened and rather lumpy. Fold in caramelized onions. This will be a <i>very</i> lumpy batter.
Cook as per your waffle iron instructions.
To serve, mix salad with dressing. Place a small amount of salad on top of waffle (or next to the waffle, if you're not sure about putting the greens on top) and drizzle everything with lemon cream. Garnish with the chopped up smoked salmon, if using- which I highly recommend doing. :)
Monday, March 9, 2015
Creamy Cauliflower Cashew Pasta
Cauliflower is all the rage on Pinterest these days, and since Alfredo is not exactly healthy, Justin and I had actually tried a cauliflower pasta sauce some months back. While it was decent, it wasn't really amazing, and I wasn't really motivated to revisit the concept anytime soon. Still, when I saw this Cauliflower Cashew Bake from Eat Within Your Means show up in my Pinterest feed, I was intrigued by the addition of cashews to the sauce, and I figured I'd give cauliflower sauce another shot. I'm glad I did! This recipe was incredibly easy to throw together, and when served with some potatoes and frozen mixed vegetables, was actually really satisfying as a dinner entree, which some meatless dishes we've tried haven't always succeeded at. When Justin first tasted it, he didn't even realize it was cauliflower instead of regular Alfredo. Also, it made a ton of leftovers, which is always a useful thing.
Ingredients:
1 head of cauliflower
6 cloves of garlic
1/2 cup raw cashews
1-1/2 teaspoons salt
1-1/2 cups milk (the original recipe actually calls for using non-dairy milk or water)
Freshly ground black pepper, to taste
A pinch of freshly ground nutmeg, optional
16 oz. macaroni noodles or other pasta shape
1 cup crunchy casserole topping of your choice (I used Italian seasoned bread crumbs)
Directions:
Preheat the oven to 350º and put a large stock pot of water on to boil. While this is heating up, wash off the cauliflower, and break the cauliflower into large florets. Put the cauliflower, cashews, and garlic cloves into the boiling water and cook for 5-6 minutes. Using a slotted spoon, take the cauliflower pieces, cashews and garlic out and put it in a blender. Add the macaroni to the boiling water, and cook according to the directions on the box. Add the salt, milk, pepper, and nutmeg to the blender and puree until creamy. Start with 1-1/2 cups of milk, and add more (up to 1/2 cup more) if it seems too thick- mine was just fine at 1-1/2 cups, but I like a thicker sauce. Once the pasta has finished cooking, drain and add to a 9x13 baking dish and stir in the cauliflower sauce. Sprinkle your casserole topping on top and bake at 350º for 15 minutes (If the topping is not browned on top, you can place it under the broiler for a minute or two, but mine was just fine).
Ingredients:
1 head of cauliflower
6 cloves of garlic
1/2 cup raw cashews
1-1/2 teaspoons salt
1-1/2 cups milk (the original recipe actually calls for using non-dairy milk or water)
Freshly ground black pepper, to taste
A pinch of freshly ground nutmeg, optional
16 oz. macaroni noodles or other pasta shape
1 cup crunchy casserole topping of your choice (I used Italian seasoned bread crumbs)
Directions:
Preheat the oven to 350º and put a large stock pot of water on to boil. While this is heating up, wash off the cauliflower, and break the cauliflower into large florets. Put the cauliflower, cashews, and garlic cloves into the boiling water and cook for 5-6 minutes. Using a slotted spoon, take the cauliflower pieces, cashews and garlic out and put it in a blender. Add the macaroni to the boiling water, and cook according to the directions on the box. Add the salt, milk, pepper, and nutmeg to the blender and puree until creamy. Start with 1-1/2 cups of milk, and add more (up to 1/2 cup more) if it seems too thick- mine was just fine at 1-1/2 cups, but I like a thicker sauce. Once the pasta has finished cooking, drain and add to a 9x13 baking dish and stir in the cauliflower sauce. Sprinkle your casserole topping on top and bake at 350º for 15 minutes (If the topping is not browned on top, you can place it under the broiler for a minute or two, but mine was just fine).
Saturday, February 21, 2015
Italian Turkey Sausage and Portobello Mushroom Crepes
Back when I was in college, I really liked to make crepes. They're cheap, you can fill them with all kinds of things, and it's easy to make a ton all at once and store them- kind of like tortillas, except cheaper- and probably less healthy. At one point, I even actually compiled a list of links to crepe filling recipes on my written blog, but I never actually got around to trying most of them. I was going through some of my old LiveJournal entries a while back, looking for something else entirely, when I ran into the crepe filling recipes and was intrigued by the sausage-portobello filling, and decided to give it a try. The recipe linked in that post is rather muddled, with the instruction telling you to add things that aren't not in the ingredients list, so I ended up basing my recipe only loosely on that one, but the end result was fantastic. Justin and I both loved it. If you want to start out with actual Italian sausage, you can feel free to do so and save yourself a little bit of work- I just used turkey sausage and added spices, since Walmart was sold out of most brands of Italian sausage, making the turkey sausage cheaper at the time that I bought it.
For the Crepes:
4 eggs
3 cups milk
2 cups all-purpose flour
2 Tbsp vegetable oil
1/4 cup sugar
In a mixing bowl, beat the eggs with a whisk. Add milk, flour, oil and sugar; beat until well mixed. Heat a lightly greased very small skillet, and add 2-4 Tbsp of batter; lift and tilt the skillet to spread the batter all across the bottom. Return skillet to heat; brown, flip over, and briefly cook the other side (kind of like pancakes, except much thinner). You'll be spending a goodly amount of time at the stove cooking the crepes- if you've got 2 small skillets you can actually get 2 pans going at once. Meanwhile, while the crepes are cooking, work on making up the filling as follows:
To turn Turkey Sausage into Italian Sausage:
1 lb turkey sausage
1/2 tsp ground black pepper
1 tsp dried parsley
1 tsp dried Italian seasoning
1/2 tsp garlic powder
Dash dried red pepper flakes
1 tsp fennel, crushed (I used Justin's mortar and pestle to just crush it up a bit- not ground too fine)
1/4 tsp paprika
1/2 tsp minced dried onion
1 tsp salt
Put the sausage and all the spices into a medium sized saucepan and cook for 10-12 minutes or until the sausage is well browned.
For the Filling:
2 Tbsp butter
2 Portobello mushroom caps, chopped
2 cloves garlic, minced
2 green onions, chopped
1/4 cup flour
1/2 cup heavy cream
browned Italian sausage
In a medium-large saucepan, melt the butter and add the mushrooms, garlic, and onions. Cook until the mushrooms release their liquid, around 5 minutes. Add the browned sausage and cook until heated through. Add the flour, and mix thoroughly, then add the cream, and cook until thickened and bubbly.
For the Crepes:
4 eggs
3 cups milk
2 cups all-purpose flour
2 Tbsp vegetable oil
1/4 cup sugar
In a mixing bowl, beat the eggs with a whisk. Add milk, flour, oil and sugar; beat until well mixed. Heat a lightly greased very small skillet, and add 2-4 Tbsp of batter; lift and tilt the skillet to spread the batter all across the bottom. Return skillet to heat; brown, flip over, and briefly cook the other side (kind of like pancakes, except much thinner). You'll be spending a goodly amount of time at the stove cooking the crepes- if you've got 2 small skillets you can actually get 2 pans going at once. Meanwhile, while the crepes are cooking, work on making up the filling as follows:
To turn Turkey Sausage into Italian Sausage:
1 lb turkey sausage
1/2 tsp ground black pepper
1 tsp dried parsley
1 tsp dried Italian seasoning
1/2 tsp garlic powder
Dash dried red pepper flakes
1 tsp fennel, crushed (I used Justin's mortar and pestle to just crush it up a bit- not ground too fine)
1/4 tsp paprika
1/2 tsp minced dried onion
1 tsp salt
Put the sausage and all the spices into a medium sized saucepan and cook for 10-12 minutes or until the sausage is well browned.
For the Filling:
2 Tbsp butter
2 Portobello mushroom caps, chopped
2 cloves garlic, minced
2 green onions, chopped
1/4 cup flour
1/2 cup heavy cream
browned Italian sausage
In a medium-large saucepan, melt the butter and add the mushrooms, garlic, and onions. Cook until the mushrooms release their liquid, around 5 minutes. Add the browned sausage and cook until heated through. Add the flour, and mix thoroughly, then add the cream, and cook until thickened and bubbly.
Monday, February 16, 2015
Easy Roasted Potatoes
This potato recipe is quick and easy to toss in the oven while I cook something on the stove top. I adapted it slightly from one in our awesome Better Homes and Gardens Cookbook.
Ingredients:
2 lb potatoes (about 6), scrubbed and quartered (you could also peel them, but they end up slightly crispier with the peels on)
1/4 cup olive oil
onion powder
garlic salt
pepper
paprika
Chinese 5 spice mix
Directions:
Preheat oven to 450º. Place quartered potatoes in a 7.5 x 11" baking pan and drizzle olive oil over the top. Sprinkle heavily with spices to taste. Stir up the potatoes to coat them all over with oil and spices. Bake at 450º for 15 minutes, stir, and bake 15 minutes more, or until potatoes are tender and brown on the edges.
Ingredients:
2 lb potatoes (about 6), scrubbed and quartered (you could also peel them, but they end up slightly crispier with the peels on)
1/4 cup olive oil
onion powder
garlic salt
pepper
paprika
Chinese 5 spice mix
Directions:
Preheat oven to 450º. Place quartered potatoes in a 7.5 x 11" baking pan and drizzle olive oil over the top. Sprinkle heavily with spices to taste. Stir up the potatoes to coat them all over with oil and spices. Bake at 450º for 15 minutes, stir, and bake 15 minutes more, or until potatoes are tender and brown on the edges.
Sunday, January 18, 2015
Fettuccine with Creamy Pesto Sauce
Creamy Pesto Pasta is something that Justin and I have been making for quite a long time- we originally came across it as a way to use up all the basil we were getting from our little flower pot garden. Most recently we've made it using beet pasta, but it still works as a fantastic recipe with regular fettuccine as well. Also, it works even better as leftovers than it does the first day, as the flavor of the herbs gets a chance to really work its way into the pasta. One of our favorite homemade pasta sauces for sure.
Ingredients:
16 oz dried penne, rotini, or fettuccini
1/2 cup chopped fresh basil or 8 tsp dried (but trust me- it tastes better with the fresh)
8 cloves garlic, minced
2 Tbsp olive oil
8 oz pkg cream cheese or Neufchâtel
1 cup cottage cheese
2/3 cup grated parmesan cheese
1/2 cup chopped fresh parsley
2 Tbsp white grape juice concentrate
2 Tbsp white wine vinegar (If you feel like following the recipe more directly, you can use 1/4 cup white wine instead of the vinegar and grape juice concentrate, but it still turns out very well with the alcohol substitute)
1/2 cup water
Directions:
Cook pasta according to package directions until al dente. Drain and keep warm.
Meanwhile, for sauce, cook basil and garlic in hot oil for about 30 seconds. Reduce heat. Add cream cheese, cottage cheese, and parmesan cheese. heat and stir until nearly smooth. Stir in parsley, wine or juice concentrate and vinegar, and water. Cook, uncovered, for 3 minutes. Add milk or water if necessary to reach desired consistency (we've never added it). Serve sauce over pasta.
Ingredients:
16 oz dried penne, rotini, or fettuccini
1/2 cup chopped fresh basil or 8 tsp dried (but trust me- it tastes better with the fresh)
8 cloves garlic, minced
2 Tbsp olive oil
8 oz pkg cream cheese or Neufchâtel
1 cup cottage cheese
2/3 cup grated parmesan cheese
1/2 cup chopped fresh parsley
2 Tbsp white grape juice concentrate
2 Tbsp white wine vinegar (If you feel like following the recipe more directly, you can use 1/4 cup white wine instead of the vinegar and grape juice concentrate, but it still turns out very well with the alcohol substitute)
1/2 cup water
Directions:
Cook pasta according to package directions until al dente. Drain and keep warm.
Meanwhile, for sauce, cook basil and garlic in hot oil for about 30 seconds. Reduce heat. Add cream cheese, cottage cheese, and parmesan cheese. heat and stir until nearly smooth. Stir in parsley, wine or juice concentrate and vinegar, and water. Cook, uncovered, for 3 minutes. Add milk or water if necessary to reach desired consistency (we've never added it). Serve sauce over pasta.
Broiled Corn (aka Crispy Kernels of Glee)
Some time back, I was browsing Pinterest and came upon instructions for how to broil frozen corn and turn it into "perfectly roasted little corn kernel babies of crispy glee." The original link actually went to a recipe for Shrimp Minestrone, which is not really my thing, but I was intrigued enough by the concept of roasting corn in the oven that I figured I'd try it as a side dish, and it actually turned out really well. It's a quick vegetable side that I can whip up as I'm setting the table for dinner, and my 2-year-old loves it. I usually make this with canned corn, since we can get the corn for cheaper at a case lot sale than buying frozen corn, but I'll admit that the frozen corn does end up a tad crispier, and doesn't have the mild "from a can" undertone to the flavor that always seems to be there whenever you use canned vegetables in a recipe.
Ingredients:
1 can corn, well drained, or 1 cup frozen corn (no need to thaw beforehand)
1 Tbsp olive oil
Spices to taste: We usually do salt (not much with the canned corn!), pepper, onion powder, garlic powder, paprika and Chinese 5 spice mix- but you can feel free to experiment and find a combination you like!
Place the corn on a broiler-safe baking sheet. Drizzle olive oil on top and sprinkle with spices, then mix together until corn is coated, and spread it out on the sheet. Broil in your oven, stirring occasionally, until corn is golden and starting to become crispy- 5-10 minutes for frozen corn or for 15 or so for canned corn.
Ingredients:
1 can corn, well drained, or 1 cup frozen corn (no need to thaw beforehand)
1 Tbsp olive oil
Spices to taste: We usually do salt (not much with the canned corn!), pepper, onion powder, garlic powder, paprika and Chinese 5 spice mix- but you can feel free to experiment and find a combination you like!
Place the corn on a broiler-safe baking sheet. Drizzle olive oil on top and sprinkle with spices, then mix together until corn is coated, and spread it out on the sheet. Broil in your oven, stirring occasionally, until corn is golden and starting to become crispy- 5-10 minutes for frozen corn or for 15 or so for canned corn.
Friday, January 16, 2015
Baked Penne with Roasted Vegetables
With school starting back up earlier this month (one last semester to go!), we've been trying to get into a brand new schedule. I really like recipes like this Baked Penne with Roasted Vegetables for busy times like this. Not only is it fairly healthy and really tasty, it also makes a TON of leftovers for our little family- the very full 9x13 pan lasts us 3 meals- so I have a couple days after making it that I don't have to worry about getting dinner on the table.
Ingredients:
Note: The original recipe actually calls for smoked mozzarella. I'm sure that would would be absolutely amazing in this recipe, but I've never managed to find any. Additionally, fontina can be very hit and miss in our ability to find. When we can't find fontina for the recipe, we just use 1-1/2 cups regular mozzarella, and it's still a really tasty dish.
Ingredients:
2 red peppers, cut into 1-inch strips
2 zucchini, quartered and sliced
2 yellow squash, quartered and sliced
4 mushrooms (the recipe calls for cremini mushrooms, but we can't always find those- plain white button mushrooms work fine)
2 zucchini, quartered and sliced
2 yellow squash, quartered and sliced
4 mushrooms (the recipe calls for cremini mushrooms, but we can't always find those- plain white button mushrooms work fine)
1 yellow onion, peeled and sliced into 1-inch strips
1/4 cup olive oil
1 tsp salt, divided
1/4 cup olive oil
1 tsp salt, divided
1 teaspoon ground black pepper, divided
1 tablespoon Italian seasoning
1 pound penne pasta
3 cups marinara sauce
1 cup grated fontina cheese
1/2 cup grated mozzarella cheese
1 1/2 cups frozen peas, thawed
1/4 cup grated Parmesan, plus 1/3 cup for on top
2 tablespoons butter, cut into small pieces
1/2 cup grated mozzarella cheese
1 1/2 cups frozen peas, thawed
1/4 cup grated Parmesan, plus 1/3 cup for on top
2 tablespoons butter, cut into small pieces
Note: The original recipe actually calls for smoked mozzarella. I'm sure that would would be absolutely amazing in this recipe, but I've never managed to find any. Additionally, fontina can be very hit and miss in our ability to find. When we can't find fontina for the recipe, we just use 1-1/2 cups regular mozzarella, and it's still a really tasty dish.
Preheat oven to 450º
Place the peppers, zucchini, squash, mushrooms, onion on a baking sheet and drizzle with olive oil, 1/2 tsp of the salt, 1/2 tsp of the pepper, and Italian seasoning. Mix until the veggies are coated and bake for 15 minutes.
Bring a large pot of salted water to a boil. Cook the penne in the water for about 6 minutes- since you'll be cooking the pasta further in the oven, you'll want to be sure that it's not fully cooked, or your pasta will end up mushy. Drain the penne in a colander.
In a large bowl (or in the same stock pot you used to boil the penne), gently mix together the vegetables, pasta, marinara, 1/2 tsp salt, 1/2 tsp pepper, cheeses, and peas. Pour into a greased 9 x 13 pan and top with remaining 1/3 cup Parmesan and butter pieces. Bake at 450º for about 25 minutes, or until top is golden.
Tuesday, December 23, 2014
Peppermint Pasta with Chocolate Ganache
Some weeks back, as I was looking at Pinterest for dinner ideas, homemade pasta collided with all the peppermint-chocolate holiday desserts I was seeing to create a crazy idea in my brain: What if I created a peppermint chocolate pasta? Homemade chocolate pasta is something that we've done several times now, both in savory dishes and in desserts- why not a fun Christmastime version with peppermint chocolate? I couldn't come up with anything good to use as a sauce for the noodles, though, so instead I decided on peppermint noodles with a chocolate sauce, and crushed candy canes as a garnish. And then, inspired by all of my family members who are allergic to chocolate and get left out of being able to eat so many Christmas goodies, I decided to make a white chocolate version as well.
I'll admit that I've never been as fond of white chocolate as the regular kind, so the chocolate version is still my favorite, but I think the white chocolate still went superbly, and it dampened the peppermint flavor just a tad less than the chocolate did- plus it also does a bit better job of showing off the pretty pink color of the noodles. :)
For the peppermint pasta:
1/2 lb all-purpose flour
1/4 cup sugar
3 large eggs
1-3/4 tsp peppermint extract
1/2 tsp vanilla
A couple drops of red food coloring (optional)
Mix together the flour and sugar in a large bowl and create a well in the center. Place the eggs, vanilla, and peppermint extract into the crater. Using a fork, lightly beat the eggs and extracts together, then slowly incorporate the flour, starting with the inner rim of the crater. Eventually, this will become a sticky mess of dough that you can knead together to form a dough ball. Add flour as you knead the dough until it is soft, but doesn't stick to your fingers, and keep kneading until it is moderately smooth. Cover with a damp cloth or plastic wrap and allow the dough to rest for 30 minutes at room temperature. Then, either send through a pasta machine, or knead for another 10 minutes or so, until the dough is completely smooth and elastic, and roll on a floured surface out with a rolling pin. In order to get a pretty marbled pink color in my noodles, I sent the dough through the pasta machine once or twice, and then put a couple drops of red food coloring onto half the dough, folded it in half, then continued with the pasta machine like normal, which caused the food coloring to stretch out with the dough.
I'm not sure you could do this if you're using a rolling pin, but if you don't care whether the dough is marbled looking, you could just add the food coloring in with the eggs and extracts, which would give it a more uniform pink color- or you could just leave the food coloring out altogether, since it doesn't affect the flavor. :) Roll the dough out until desired thickness and then cut into noodles, and cook until al dente. While pasta is cooking, crush up the candy canes (I put a couple of candy canes in a sandwich bag, closed it up, and hit it with the flat side of a meat mallet a few couple of times) and make the sauce:
For Sauce:
4 oz semisweet chocolate chips (or white chocolate chips)
1/2 cup cream
Put the chocolate chips in a small bowl. In a small saucepan heat the cream over lowish heat (or medium heat, if you're using our stove), stirring occasionally until steaming hot (but not boiling). Remove from heat. Pour half of hot cream over chocolate. Allow to stand for a minute, stir until smooth, and gradually stir in rest of cream.
Drain the pasta, and drizzle chocolate sauce over individual servings. Sprinkle liberally with the crushed candy canes- the chocolate and cream combo is very rich and really dampens the peppermint flavor of the noodles, so a lot of the peppermint flavor you're going to get will come from the garnish. Enjoy!
Subscribe to:
Posts (Atom)